IDS - Animated Short Film - Production Diary - 005
This is part Four of my production diary for my short animated film “ I Dont Steal “. Where I go over working on some of the scenes that require 3d environments.
Project Update: Storyboarding
The last couple weeks I've had some serious inspiration from watching other animated short films, specifically shorts from Robert Valley, with his work on Love, Death, + Robots, and his own personal film Pear Cider and Cigarettes.
Robert has his own YouTube channel where he shares his animation process. While watching these it helped put into perspective some of the work I had been missing in my own. Watching his work, his process was thumbnailing, editing those into the timeline, then doing a hybrid of storyboarding and layout at the same time.
Up until now I had been making a storyboard/animatic in 3D with generic models to start blocking out shots and I had only made it about halfway through my film for over 6+ months.
I realized now that was adding an unnecessary step that was not only slowing me down from completing just an animatic but also setting me up for failure later with my shot timing.
The iPad/Procreate Combo
Following what Robert Valley does and what Im sure all other professional animators do, I began storyboarding every shot from start to finish on my iPad using Procreate.
This approach gave me more freedom than my previous 3D blocking method just by way of accessibility, I didn’t have to sit down at my desk, open C4D, hunt down models, etc... Using the Apple Pencil with Procreate allowed me to quickly sketch out ideas without getting bogged down in technical details.
I exported every board into a TIFF file then used Affinity Photo to batch export all the slices into individual frames I could edit in the timeline.
This workflow was incredibly efficient. Every time I finished a page in Procreate which was 20 panel drawings, I could export them as high-quality TIFF files. Affinity Photo's batch processing made it simple to prepare all these frames for editing and label them in the correct number order and I also didn't have to process each drawing individually.
Once in edit with all my images this helped me really find my timing and also showed me a whole scene I needed that I hadn't previously thought about.
Once I could see all the shots laid out in sequence, the story became much clearer. During this process, I noticed the film missing something at the end. This missing scene I feel was the cherry on top that I never knew was missing until seeing everything visualized in order.
What took me 6 plus months of procrastinating I accomplished in about a week while sitting on the couch watching TV.
The informal, relaxed approach made a huge difference in my productivity. Instead of treating storyboarding as a formal task that required me to be at my desk, I could work on it casually while relaxing.
I now have a fully complete animatic with timing and every shot accounted for and labeled. This represents a major milestone for the project. The animatic provides a complete blueprint for production, with precise timing for each shot. Having everything labeled and organized means I can now move forward knowing exactly what needs to be created and how it all fits together.
Here is a timelapse generated by procreate where you can see how I put these panels together this is about 8 Hours of work, according to Procreate Canvas information, crammed into about 4 minutes.
Why This Worked So Much Better
The iPad workflow was a game changer. Instead of getting bogged down in 3D blocking that felt more like work than creative exploration, I could just sketch freely what I saw in my head, its all going to be shot live action footage anyways so theres no real need to polish anything.
The Affinity Photo batch export was crucial too. I could take all my Procreate boards and slice them into individual frames in seconds then drop them into the timeline.
Most importantly, working this way revealed story beats I'd been missing.
Current Progress
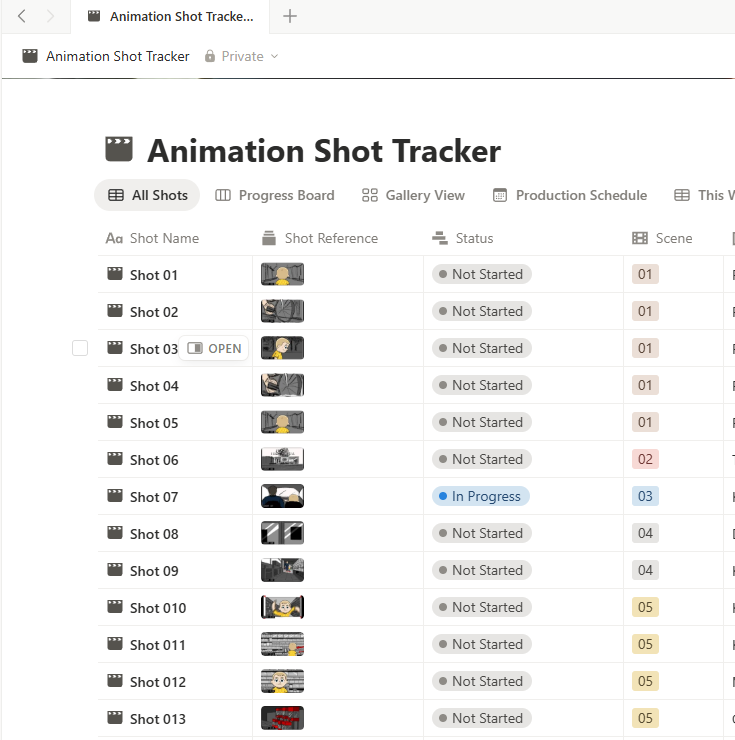
I have a complete animatic. Every shot is timed, labeled, and accounted for and logged in a spreadsheet to keep track of over all progress as I work. This is the foundation I should have built six months ago, but better late than never.
The relief of having this locked down is huge. Now I can move forward with confidence on shot production knowing the timing works and the story flows properly.
Next steps
With the animatic complete, I can now:
Start shooting live action plates with exact timing references
Begin character animation knowing the precise durations needed
Move into full production mode instead of endless pre-production
Sometimes the biggest breakthroughs come from stripping away complexity, not adding it.
Want to help out?
This is a passion project that I am ultimately doing both in my own time and my own money as well as calling in favors when I can. If you’d like to help me out in any way I’ve added a donation option below if you feel the want/need to help contribute to this project. Anyone who donates will have a credit added in the film.
If you can’t donate please consider signing up to the email list to get updates on the project as it progresses along.


